


Servicing your Feathering Propeller
We can’t thank Nick & Terysa from Sailing Ruby Rose enough for putting this video together that shows perfectly how to go about servicing your Feathering propeller and rope cutter.
Pre launch
So just this is a little bit technical stuff and probably only really important for those of you that have feathering props but also just a prop service.
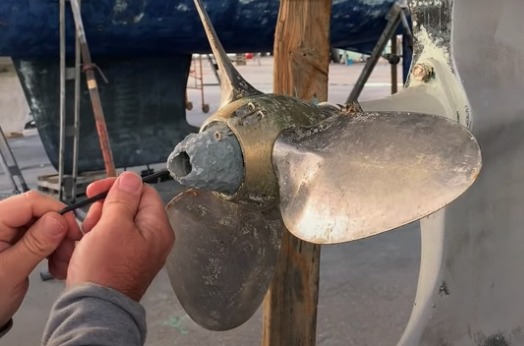
So, this is our FeatherStream prop and it needs a couple of things changing every year – one of those is the anode. The anode sits at the end of our propeller – this is the anode that gets the most wear. The prop essentially is the biggest metal thing exposed to the elements and so really, these small anode’s go very, very quickly – so one of these a season.
And the other thing I need to do today is these – little spacers – they are sacrificial spacers. We have a rope cutter – now for those of you who don’t have a rope cutter and if you are going long-term cruising, I would seriously suggest you get one.
It has dug us out of problems so many times – literally it has stopped the Coast Guard being called at least twice because we were able to motor with a rope around the prop – because it literally shears through it all. These little plates act like a rotating pair of scissors (we have a rope cutter) and there are two little plastic discs – little spacers between the discs and they need to replace as well.
So servicing your Feathering propeller is a job to do this morning – so why don’t I just show you what I’m doing.
Another thing is for today’s fun and games is Blue Loctite. Now Loctite, for those of you who don’t know is a type of thread locker. There are different incarnations of this – some work in the wet – some work in the dry, some are stronger than others.
I keep multiple bottles of this lying around, literally thread lock is such an amazing thing to have on a boat. The action of it is that as you basically put a little drop on the thread of a screw as you put it into a hole and the lack of air causes it to set – so it’s like a liquid plastic that sets when there’s no airs and this stuff is brilliant.
So anyway, we are going to take the prop apart, take the rope cutter apart, change the anode and then we have just got a little bit of work to do before we get this prop back in the water – we will fill it full of grease again just to make sure that the bearings are all working for the season.
Changing the prop anode
So, as you can see this is one season’s use of our anode. It is always invariably much, much worse when we are in marinas. Stray currents in marinas absolutely destroy these things. Not our boat we are completely earthed, but other people have boats that have stray earths.
We just ease off the anode – so that is the remains of our anode. Again, for those who don’t know, the anode is sacrificial – zinc is more attractive to electricity than the brass of this prop. So rather than stray currents eating away at our lovely prop, it sacrifices the anode.
Just to show you the anode – that’s one season for us – incredible.
The next job to do is to clean the screws, just to clean any scale or mud or debris from the threads. Once that’s done, just clean any residual mud from around the inside of the prop and then we get to reapply the anode.
So first we’re just going to offer up the anode just to make sure they have sent us the right size – make sure the screw is fit to the holes. Add a drop or two of threadlocker or Loctite – put that in there and then just tighten it up, added to the propeller and just screw it in. That is it simple job easy to do it should take you less than half an hour.
Servicing your rope cutter
This is our rope cutter and it’s still fiercely sharp and the discs here – in fact one of the discs has completely gone. Now these are little bit tricky to get off. So what I have got to do is get all of these Allen keys out, pull these apart – try not to cut my fingers to ribbons and then replace this disc with a nice new one.
So, with the blades of the rope cutter removed we can now apply these lovely two new discs. We also need to spend some time here getting the residual strands of Polyprop rope from around the cutter.
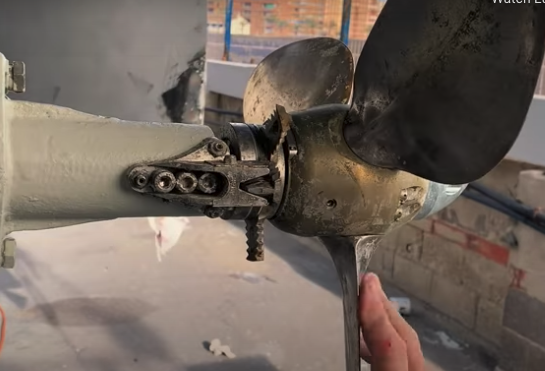
And if you look – that is the old disc completely worn out, the abrasion and the actions of those two opposing rope cutting plates cause those to wear out. They actually wear out far faster where there is silt in the water – so for those of you who keep their boats on mud moorings be aware that the maintenance schedule is different.
As you can see we’ve got some strands of that pesky rope still intertwined with our cutter so a quick clean of that with a screwdriver making sure not to scratch the surfaces. And reassembly is exactly the reverse process of disassembly. There are four retaining screws that need to be reattached, you put the sacrificial plates – tighten everything up by hand and a little bit of thread lock as with everything in those screws just to ensure that they don’t work loose.
A simple job should take you no more than half an hour. Again, please watch your fingers with these things, rope cutters are fiendishly sharp.
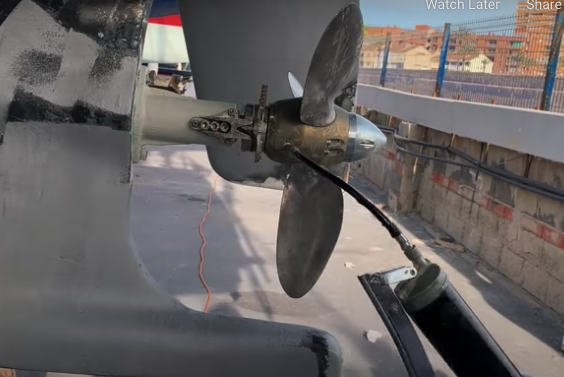
There we go about half an hour later still 10 fingers fall intact; we have both sacrificial discs back in place, located in the right way round. Then there is just one final job just to make sure the proper turns freely and does not bind.
Greasing the FeatherStream propeller
Now greasing your prop is fairly easy – you need to look at instructions for the propeller that you have. In the case of our propeller there is a little grub screw you literally use an Allen key to remove the grub screw, you then attach a grease nipples to the hole where the grub screw came out – and then attach a grease gun to the grease nipple.
Now the grease in the grease gun has been supplied with the manufacturers propeller so contact your propeller manufacturer to make sure you have the correct viscosity of grease.
One reason we do this is obviously to fill the mechanism for the feathering blades with grease, but another secondary factor that we get from this is that it flushes out any residual salt water or debris that has accumulated inside the boss of the propeller during the season.
So, finally we remove the grease nipple apply a little bit of threadlock to the grub screw and reattach it. And that is a simple job.
And one final job is to use an old wire brush just to remove any scale deposits or rust from the propeller. It’s very important to try not to actually score or mark the propellers because it will lend itself to building up debris faster. But a light polish and then a damp cloth with maybe some polishing agent and we are free. So we have finished servicing your Feathering propeller – the prop is as good as new and ready to service for another year.
Nick & Terysa sold their house, re-homed their cats and bought a yacht to fulfil their dream of sailing round the world. They now share their daily life on social media and YouTube.
If you have enjoyed the servicing your Feathering propeller video you can watch more of Nick and Terysa and their escapades on Sailing Ruby Rose on their YouTube channel.
Posted on